Cherry Pie Filling

Cherry Pie Filling is a delightful ingredient that brings the essence of summer right to your kitchen, whether you’re crafting a classic pie or a fruity dessert topping. This sweet and tangy filling is bursting with the natural flavor of cherries, making it a versatile choice for everything from a homemade pie to spooning over ice cream. The shimmering, ruby-red appearance is not only appetizing but invites you to indulge in its rich, luscious texture.
Table of Contents
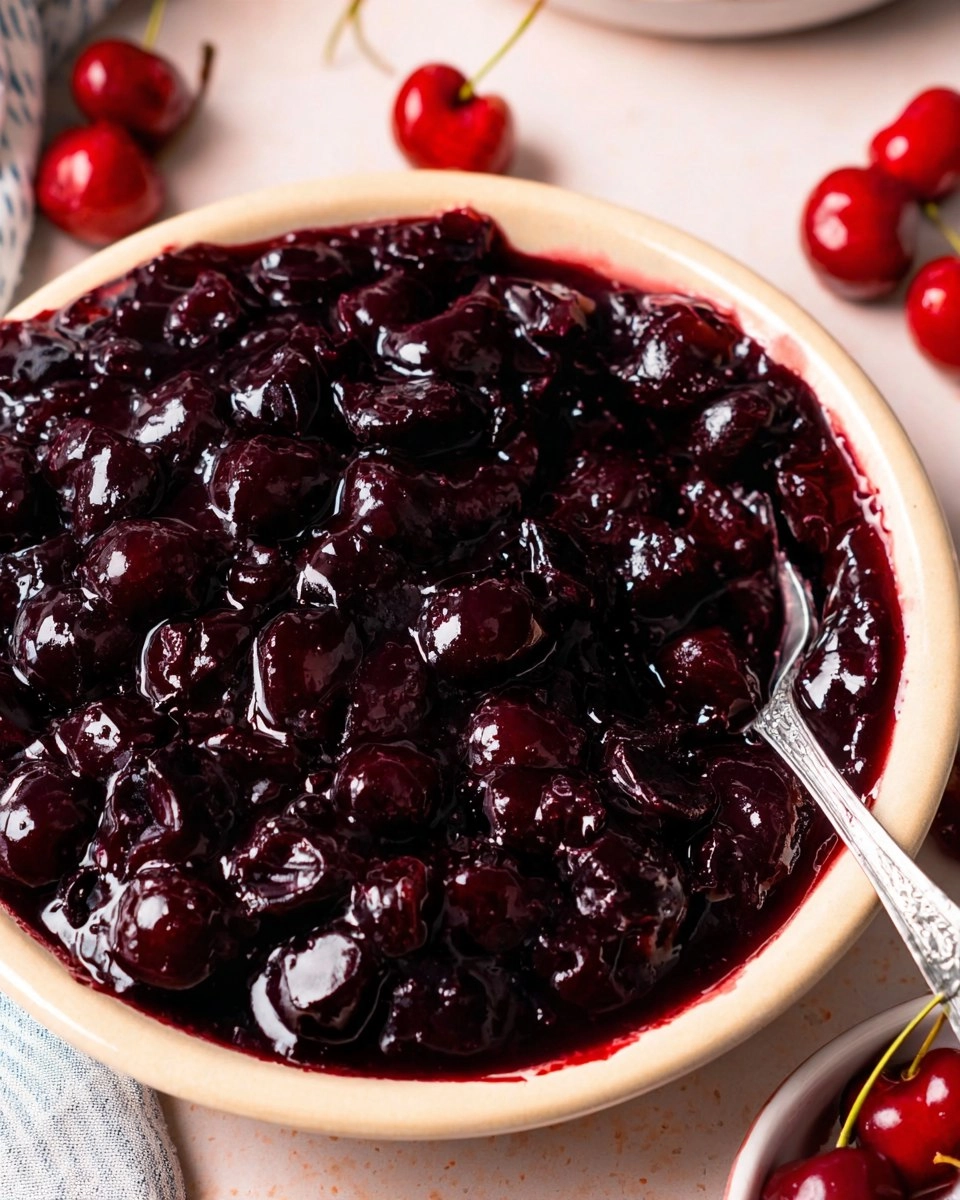
I vividly remember the first time I made Cherry Pie Filling. It was a warm summer evening, and I had just returned from the local farmer’s market, fresh cherries in hand. The scent of the cherries filled my kitchen as I cooked them down, the sweet aroma mingling with the hint of almond from the extract. It was a simple recipe, requiring minimal ingredients and time, yet it delivered maximum flavor that truly stood out from the usual store-bought versions. Trust me, once you’ve tasted homemade Cherry Pie Filling, there’s no turning back!
Why You’ll Love This Recipe
- Simple & Quick: You can whip up a batch in no time—perfect for last-minute desserts!
- Irresistible Flavor: Sweet cherries with a hint of almond create a taste that’s simply out of this world.
- Eye-Catching Appeal: The bright, vibrant color makes your desserts pop and wow your guests.
- Flexible Serving: Enjoy it in pies, atop pancakes, or straight from the jar as a snack.
- Diet-Friendly Options: Easily adaptable to meet various dietary needs if you adjust the sugar.
Ingredients You’ll Need
- 1 lb Cherries, fresh or frozen: The star of the show! Use ripe, juicy cherries for the best flavor. Frozen ones work in a pinch—just remember they may release more liquid, affecting consistency.
- 1/2 cup White granulated sugar: This adds sweetness and balance to the tart cherries. If you prefer, you can swap in brown sugar for a hint of molasses flavor.
- 1 TBSP Cornstarch: This thickening agent helps achieve the perfect consistency. If you’re out, you can use arrowroot powder or even flour, but results may vary.
- 1 TBSP Water: A small amount to help combine the cornstarch and aid in creating the filling’s texture.
- 1/4 tsp Almond extract: This adds a unique depth of flavor that pairs beautifully with the cherries, enhancing sweetness. You could substitute vanilla extract if you prefer a different taste.
How to Make Cherry Pie Filling
Prep the Cherries: If you’re using fresh cherries, take the time to pit them—this ensures every bite is pleasant. In a medium saucepan, combine the pitted cherries, 1/2 cup white granulated sugar, 1 TBSP cornstarch, 1 TBSP water, and 1/4 tsp almond extract. Mix it all together gently.
Cook the Mixture: Place the saucepan on medium heat. As the mixture heats up, you’ll see the cherries release their juice. Stir occasionally and cook until the cherries soften—this usually takes about 5 to 7 minutes. If you like a chunkier filling, you can mash some of the cherries with a potato masher during this time. I like mine more like a compote, so I mash them thoroughly.
Thicken the Filling: Keep cooking, stirring periodically, until the filling has thickened to your liking, about 10 to 15 minutes. Once ready, you’ll have around 1 1/2 cups of delicious cherry filling. Pour it into a bowl, allowing it to cool completely. If you’re in a hurry, pop it in the fridge temporarily to speed up the chilling process.
Storing & Reheating
For best results, store your Cherry Pie Filling in an airtight container at room temperature for up to 2 days if you’re planning to use it promptly. In the fridge, it can last up to one week. If you’ve made extra or want to prepare ahead, freeze it! Just make sure to use a freezer-safe container, and it will keep well for up to 3 months. To reheat, warm it gently on the stove over low heat for about 5 minutes, stirring regularly. Keep in mind that the texture might soften slightly after freezing, but a quick stir can refresh its appeal.
Chef’s Helpful Tips
- When pitting cherries, a cherry pitter works wonders and saves you time. If you don’t have one, a small knife will do the trick, just be cautious.
- Make sure the cornstarch is well mixed with the water to avoid lumps in your filling.
- If the mixture seems too thin while cooking, don’t hesitate to add a touch more cornstarch dissolved in water—just whisk it in slowly!
- For an even richer taste, consider adding a splash of lemon juice. The acidity brightens the flavor of the cherries.
- You can experiment with different extracts like vanilla or even a splash of bourbon for a grown-up twist!
This homemade Cherry Pie Filling is truly a delightful addition to your dessert repertoire. With just a handful of ingredients and simple steps, you’ll be crafting a filling that’s delicious and memorable. Feel free to play around with the flavors and use it in different ways—you may just find your favorite new dessert topping!
Recipe FAQs
Can I use frozen cherries for this recipe?
Absolutely! Frozen cherries are a fantastic alternative to fresh ones, especially if they’re not in season. Just remember that frozen cherries may release more liquid, so you might need to cook the filling slightly longer to achieve the desired thickness.
How can I use Cherry Pie Filling besides pie?
The possibilities are endless! Use it as a topping for ice cream, yogurt, or pancakes, mix it into oatmeal, or even use it in smoothies. It’s a delicious way to add a fruity punch to a variety of desserts.
Can I make Cherry Pie Filling ahead of time?
Yes, you can! This filling stores well in the refrigerator for up to a week or in the freezer for up to three months. Just be sure to let it cool completely before storing, and reheat gently when you’re ready to use it.
What can I do if my filling is too runny?
If your filling ends up too runny, don’t worry! You can thicken it by mixing a bit more cornstarch with cold water and adding it back to the mixture while cooking on low heat. Stir continuously until it achieves your desired consistency.
PrintMore Desserts & Appetizers Recipes
- Strawberry Pretzel Salad | Sweet No-Bake Potluck Dessert
- Easy Caprese White Bean Salad
- Creamy Cucumber Salad with Sour Cream & Dill
- Easy Homemade Cherry Pie
- Cherry Hand Pies
Did You Enjoy Making This Recipe? Please rate this recipe with ⭐⭐⭐⭐⭐ or leave a comment.
📖 Recipe Card

Cherry Pie Filling
- Prep Time: 5 minutes
- Cook Time: 15 minutes
- Total Time: 20 minutes
- Yield: 1 1/2 cups 1x
- Category: Desserts
- Method: Stovetop
- Cuisine: American
Description
This Cherry Pie Filling stands out with its amazing flavor and simplicity. Made with fresh cherries, sugar, and a hint of almond extract, it’s a perfect addition to any dessert or as a sweet topping. Enjoy this quick and easy recipe that brings a taste of summer to your table.
Ingredients
- 1 lb Cherries, fresh or frozen
- 1/2 cup White granulated sugar
- 1 TBSP Cornstarch
- 1 TBSP Water
- 1/4 tsp Almond extract
Instructions
- Pit fresh cherries if using. In a medium saucepan, combine cherries, sugar, cornstarch, water, and almond extract. Mix well.
- Heat over medium heat until the juices from the cherries start to separate and they soften. Mash the cherries to your desired consistency.
- Continue heating until the cherry filling thickens, yielding about 1 1/2 cups. Pour into a bowl and allow to cool completely, or refrigerate for quicker chilling.
Notes
Fresh cherries can be substituted with frozen cherries, but ensure they are thawed and drained before use.
Adjust the amount of sugar to taste depending on the tartness of the cherries.
This filling can be used for pies, tarts, or as a topping for ice cream.
Nutrition
- Serving Size: 1/4 cup
- Calories: 120
- Sugar: 24g
- Sodium: 0mg
- Fat: 0g
- Saturated Fat: 0g
- Unsaturated Fat: 0g
- Trans Fat: 0g
- Carbohydrates: 30g
- Fiber: 2g
- Protein: 1g
- Cholesterol: 0mg