Plum Bars

Plum bars are a nostalgic treat that beautifully combine tender crust with juicy plum filling. The blend of sweet and tart from fresh plums, paired with a buttery base, creates a dessert that’s not only delicious but also visually appealing. The golden edges and the vibrant plum color will give your kitchen a delightful aroma, making it hard for anyone to resist their charm. I discovered these bars during a late summer gathering, where plums from the farmer’s market were in abundance. Ever since that first bite, they’ve become a staple in my home whenever I crave comfort food or need a quick dessert to share.
Table of Contents
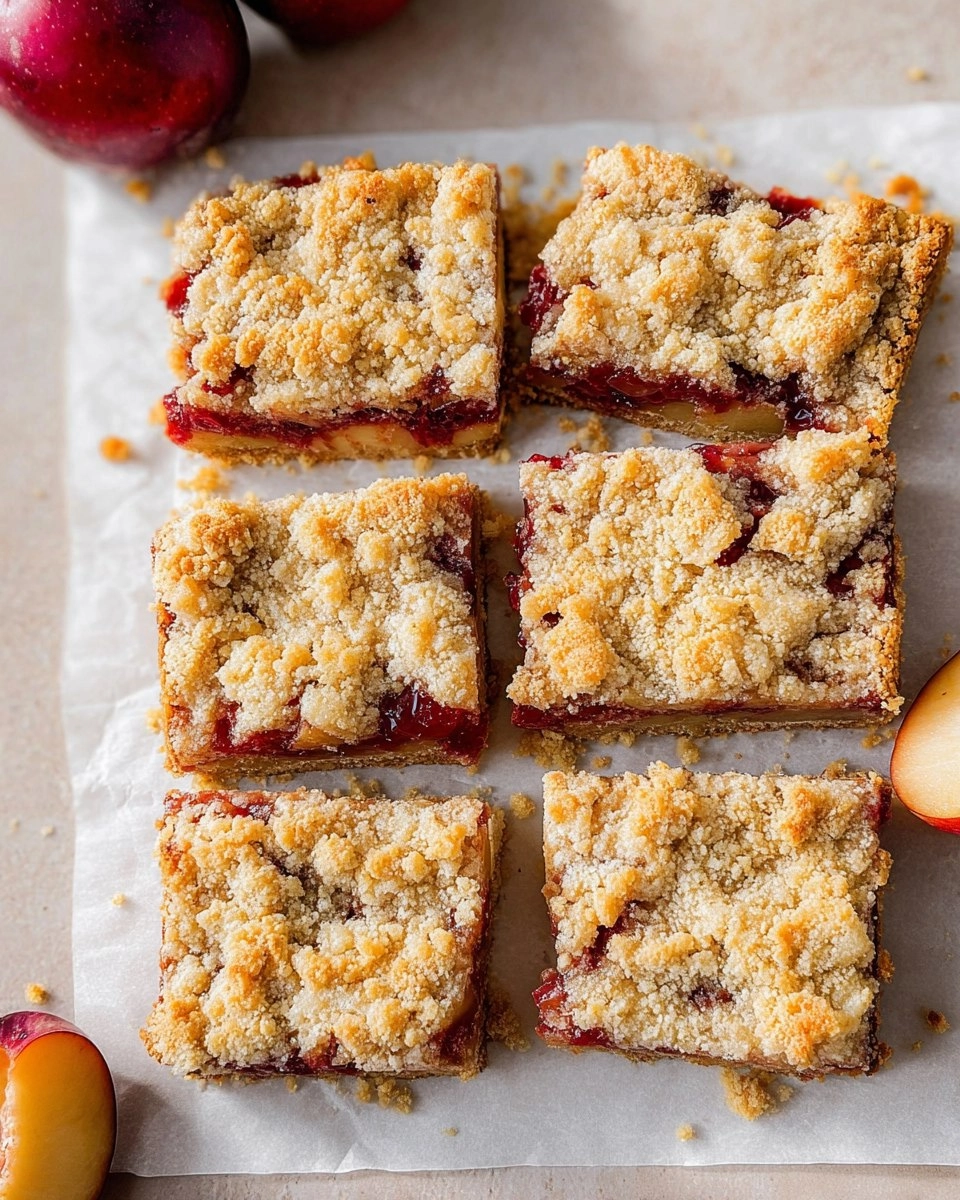
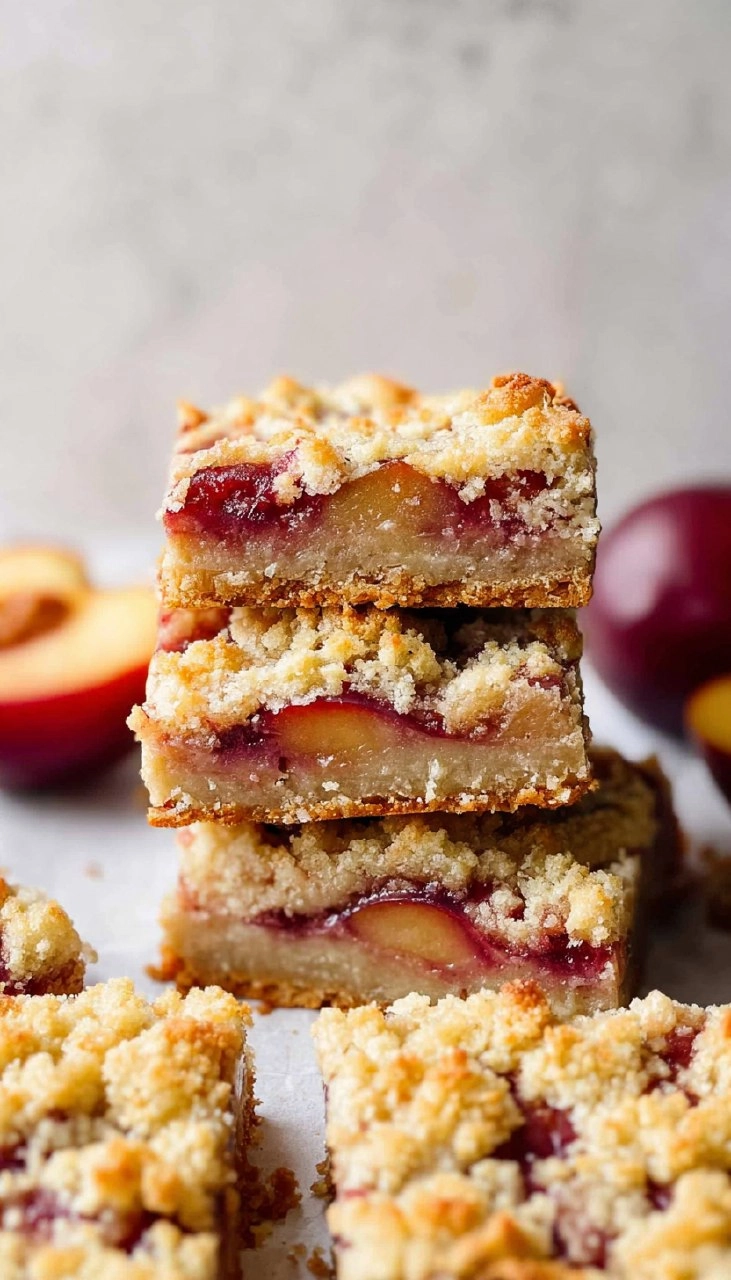
These plum bars are more than just delicious; they also pack a punch of nostalgia. The simplicity of the recipe makes it perfect for both novice bakers and those with experience. It’s satisfying to slice into these bars, revealing their luscious filling, and they make for a splendid treat to enjoy with a cup of tea or coffee. Plus, who wouldn’t love a dessert that’s both sweet and a tad tart? I invite you to dive into this recipe and experience the joy of plum bars for yourself!
Why You’ll Love This Recipe
- Simple & Quick: With just a few ingredients, you can whip these up in about 40 minutes!
- Irresistible Flavor: The sweet-sour combo of plums creates a burst of fresh flavor that’s truly delightful.
- Eye-Catching Appeal: These bars are as visually enticing as they are tasty, perfect for impressing friends.
- Flexible Serving: Excellent for any occasion—served as a dessert, snack, or even a delicious breakfast treat.
- Budget-Friendly: Utilizing seasonal plums, this dessert won’t break the bank.
Ingredients You’ll Need
- 1 ¾ cup all-purpose flour: This is the base of the crust. All-purpose flour gives the right balance of flavor and texture.
- ⅔ cup sugar: Sweetens the crust and filling. You can use granulated or even brown sugar for a richer flavor.
- ½ tsp baking powder: This gives the crust a nice lift, ensuring it’s light and crumbly.
- ¼ tsp salt: Enhances the flavors and balances the sweetness.
- ½ cup butter, cold: Butter adds richness. Using cold butter helps create a flaky crust—don’t forget to keep it chilled!
- 1 egg, whisked: Acts as a binder for the crust. For a vegan alternative, use a flax egg.
- 2 tbsp milk: Provides moisture; you can substitute any plant-based milk if desired.
- 4 plums, diced small: The star of the recipe! Choose ripe but firm plums for the best texture.
- ¼ cup sugar: Additional sugar for sweetness in the filling.
- 2 tbsp all-purpose flour: Helps thicken the plum filling, keeping it from becoming too runny.
- ½ tsp vanilla extract: Vanilla adds a warm note that complements the plums beautifully.
How to Make Plum Bars
Preheat the Oven: Start by preheating your oven to 400°F (200°C). Line an 8×8 baking dish with parchment paper for easy removal and cleanup.
Mix the Crust Ingredients: In a large bowl, stir together 1 ¾ cups all-purpose flour, ⅔ cup sugar, ½ tsp baking powder, and ¼ tsp salt until combined. Then grate ½ cup of cold butter into the mixture. Use your hands to mix until the butter resembles small pebbles.
Add the Egg and Milk: Pour in 1 whisked egg and 2 tbsp milk, stirring until just combined into a moist dough.
Prepare the Plum Filling: In a separate bowl, combine 4 diced plums, ¼ cup sugar, 2 tbsp all-purpose flour, and ½ tsp vanilla extract. Mix until the plums are evenly coated.
Assemble the Bars: Take ⅔ of the crust mixture and press it firmly into the bottom of your prepared baking dish to form the base. Next, evenly spread the plum mixture over the crust, followed by sprinkling the remaining crust mixture on top.
Bake: Place your baking dish in the preheated oven and bake for 30 to 32 minutes or until the edges are golden brown and the filling is bubbly.
Cool and Serve: Once done, allow the plum bars to cool at room temperature. Slice into squares and serve, enjoying the lush plum filling.
Storing & Reheating
To store your plum bars, keep them covered at room temperature for up to 2 days. If you need to store them longer, refrigerate in an airtight container for up to a week. For freezing, place bars in a single layer in a freezer-safe container. They can last up to 3 months frozen; just be sure to thaw them in the fridge overnight before serving. To refresh, simply reheat in a 350°F (175°C) oven for about 10 minutes, ensuring they are warmed through.
Chef’s Helpful Tips
- Ingredient Temperature: Use cold butter for the crust—this is crucial for achieving that flaky texture.
- Plum Selection: Opt for ripe plums that yield slightly when pressed. This ensures they’re juicy but not overripe.
- Don’t Overmix: When combining the crust ingredients, be careful to mix just until combined. Overmixing can lead to tough bars.
- Flavor Variations: Consider adding a dash of cinnamon for warmth or a sprinkle of nutmeg to enhance the flavor of the plums.
- Make Ahead: You can prepare the crust and filling a day in advance, assembling and baking just before serving for freshest taste.
For every home baker, exploring the delightful territory of plum bars is deeply gratifying. These treats offer a satisfying crunch followed by the unmistakable burst of sweet and tangy fruit. Don’t shy away from playing with the recipe—perhaps experiment with different fruit or spices! I hope you find as much joy in baking these as I have. Happy baking, and enjoy every absolutely delicious bite!
Recipe FAQs
How do I know when the plum bars are done baking?
You’ll know they’re done when the edges are golden brown and the filling is bubbling at the edges. A toothpick inserted in the crust should come out clean.
Can I use other fruits instead of plums?
Absolutely! Feel free to swap plums for peaches, apricots, or even cherries. Adjust the sugar based on the sweetness of the fruit you choose.
Are these bars suitable for freezing?
Yes! You can freeze them for up to 3 months. Just make sure they are fully cooled before wrapping them securely for the freezer.
Can I make these gluten-free?
Yes! Substitute the all-purpose flour with a gluten-free blend. This works well and keeps the integrity of the bars intact while catering to gluten-free diets.
PrintMore Desserts & Appetizers Recipes
Did You Enjoy Making This Recipe? Please rate this recipe with ⭐⭐⭐⭐⭐ or leave a comment.
📖 Recipe Card
Plum Bars
- Prep Time: 15 minutes
- Cook Time: 30-32 minutes
- Total Time: 0 hours
- Yield: 9 bars 1x
- Category: Desserts & Appetizers
- Method: Baking
- Cuisine: American
Description
This Plum Bars recipe showcases the irresistible flavor of sweet plums combined with a buttery crust. Easy to make and perfect for sharing, these bars will delight your taste buds!
Ingredients
- 1 ¾ cup all purpose flour
- ⅔ cup sugar
- ½ tsp baking powder
- ¼ tsp salt
- ½ cup butter, cold
- 1 egg, whisked
- 2 tbsp milk
- 4 plums, diced small
- ¼ cup sugar
- 2 tbsp all purpose flour
- ½ tsp vanilla extract
Instructions
- Preheat the oven to 400° F and line an 8×8 baking dish with parchment paper.
- In a large bowl, mix flour, sugar, baking powder, and salt. Grate the cold butter directly into this mixture.
- Combine until the butter resembles small pebbles, then add the whisked egg and milk, mixing until combined.
- In another bowl, mix diced plums with sugar, flour, and vanilla, stirring until well combined.
- Press ⅔ of the crust mixture into the prepared baking pan using your hands.
- Spread the plum mixture evenly over the crust, then sprinkle the remaining crust mixture on top.
- Bake for 30-32 minutes until the edges are golden brown. Let cool, slice, and enjoy!
Notes
For a richer flavor, consider using brown sugar in place of regular sugar.
Feel free to substitute other fruits like peaches or cherries if plums aren’t available.
These bars can be stored in an airtight container for up to a week.
Nutrition
- Serving Size: 1 bar
- Calories: 280
- Sugar: 15g
- Sodium: 150mg
- Fat: 12g
- Saturated Fat: 7g
- Unsaturated Fat: 5g
- Trans Fat: 0g
- Carbohydrates: 39g
- Fiber: 1g
- Protein: 3g
- Cholesterol: 30mg